Add the wishlist button to your product pages (Online Store 2.0 themes)
Overview
If your Shopify store uses an Online Store 2.0 theme, you can add the wishlist button to your product pages directly from the Shopify theme editor — no code needed.
This works with Shopify themes like Dawn, Sense, Craft, Refresh, and most themes released after 2021.
The wishlist button appears on any product page that uses the product template where you add the block.
Before you start
Make sure the app embed is already turned on in your theme before you add the wishlist button block to your product page.
If the wishlist button block does not appear in the theme editor, first complete the app embed activation step in the earlier setup guide.
How to check if you have an Online Store 2.0 theme
You are most likely using an Online Store 2.0 theme if:
Your theme came from the Shopify Theme Store and was released or updated after 2021
Your theme editor lets you add blocks inside product sections
Your product template includes a section such as Product information or Product details with movable blocks
If you are not sure, check your theme documentation or ask your theme developer.
Add the wishlist button to your product page
From your Shopify admin, go to Online Store → Themes and click Customize on your published theme.
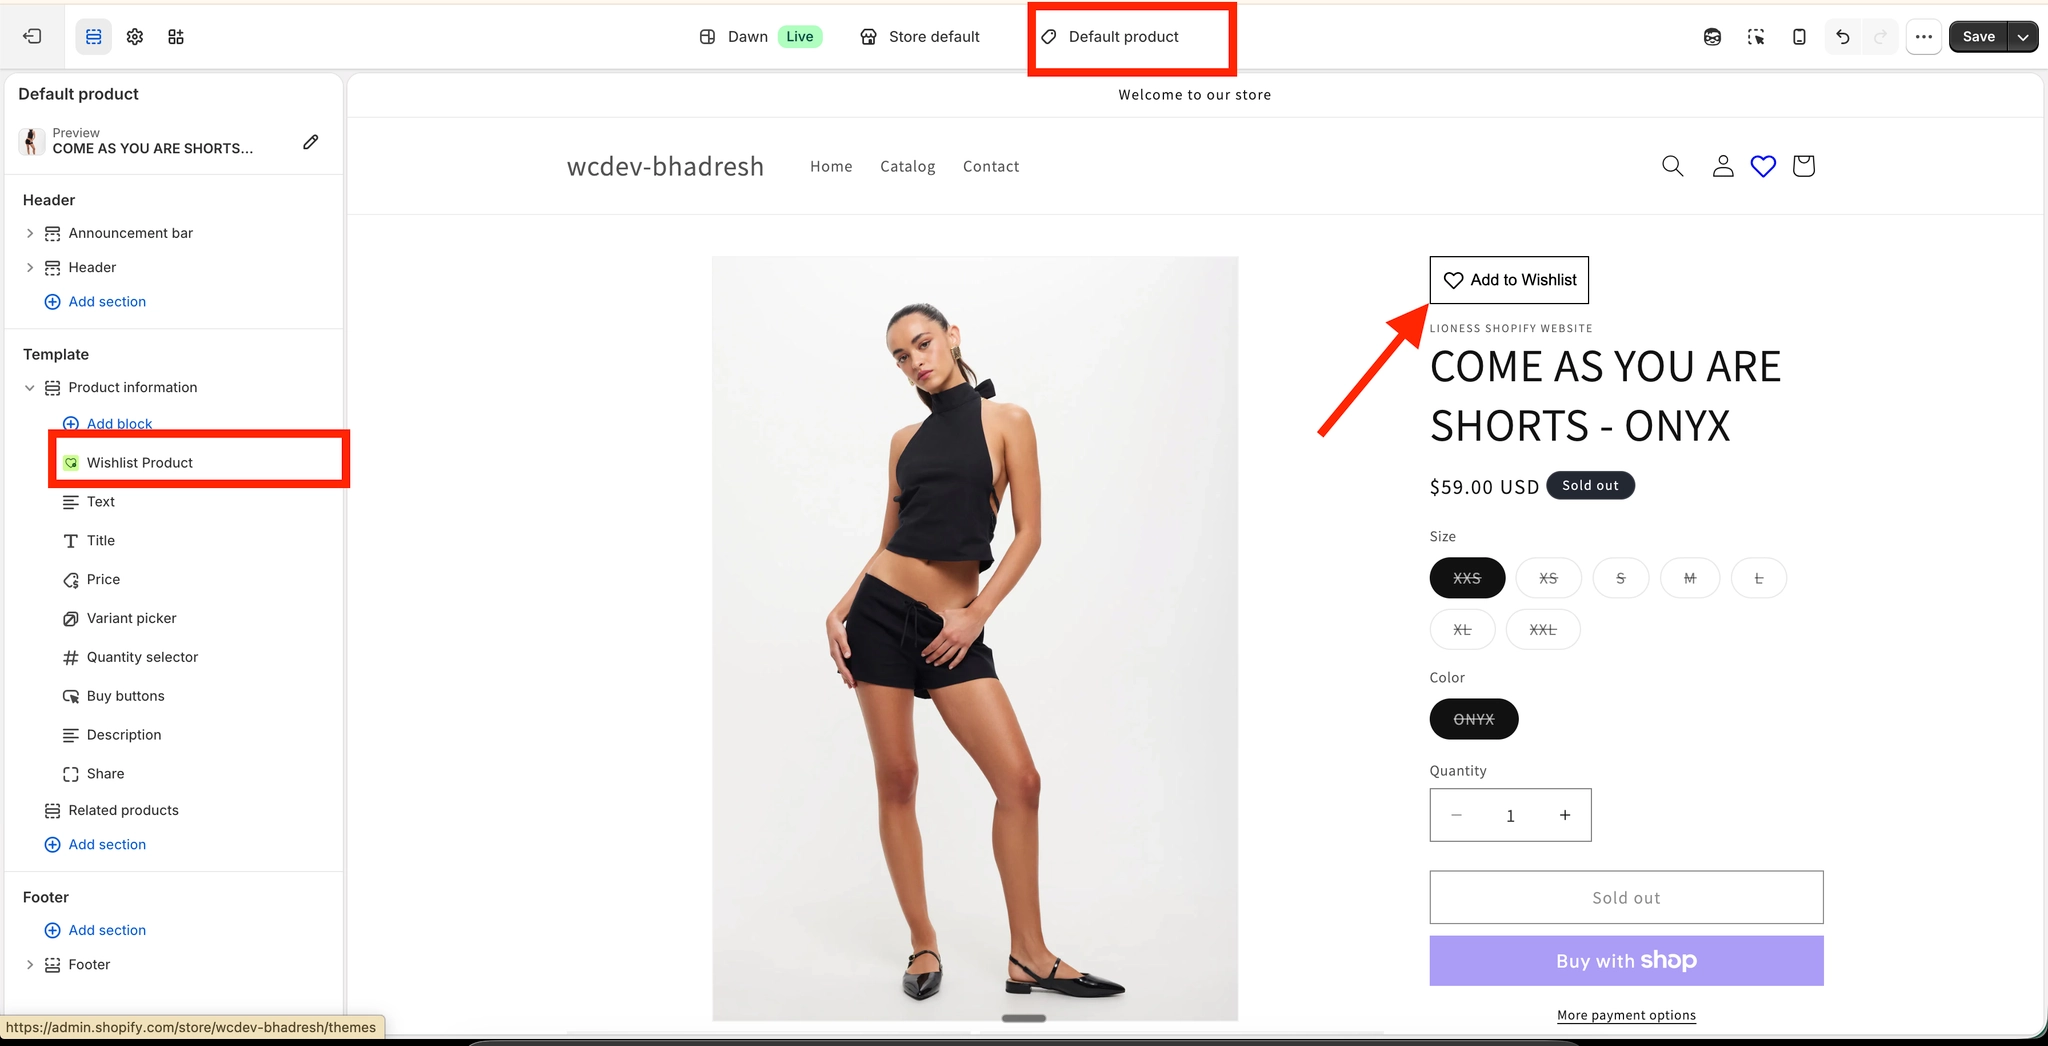
In the top dropdown of the theme editor, switch to Products → Default product, or choose the specific product template you want to update.
In the left sidebar, click the main product section. Depending on your theme, this may be called Product information, Product details, or something similar.
Click Add block, search for Wishlist Product Block, and select it.
Drag the block to the position you want. Many stores place it:
Below the product title
Near the price
Under the Add to cart button
Click Save in the top right corner of the theme editor.
After saving, the wishlist button will appear on all product pages that use that template.
For the best customer experience, place the wishlist button close to the product title or Add to cart area so it is easy to notice without interrupting the buying flow.
Adjust the button position
You can change the button position at any time from the theme editor.
Open the same product template
Find the Wishlist Product Block in the left sidebar
Drag it up or down to reorder it
Use the live preview on the right to confirm how it looks
Click Save
If you use multiple product templates
Many Shopify stores use more than one product template. For example, you might have separate templates for:
Featured products
Pre-order products
Bundles
Products with custom layouts
If that is the case, you need to add the wishlist block to each product template where you want the button to appear.
Adding the block to one product template does not automatically add it to your other product templates.
How to confirm it is working
After saving your changes:
Open a product page on your storefront that uses the updated template
Check that the wishlist button is visible in the position you chose
Click the button to confirm it responds as expected
If the button appears on some products but not others, those products are likely using a different product template.
Troubleshooting
First, make sure the app embed is enabled in your theme. Then return to the product template and try adding the block again.
If you still do not see it, confirm that your store is using an Online Store 2.0 theme.
This usually means your store uses multiple product templates. Add the wishlist block to each template where you want the button to appear.
Open the product template in the theme editor and drag the Wishlist Product Block to a new position in the left sidebar, then save.
If your theme supports Shopify Online Store 2.0 sections and blocks on product templates, this setup method should work. If not, you may need a different installation method for vintage themes.
Best practices
Add the button to every active product template so the experience stays consistent across your store
Place the button near the main purchase actions so shoppers can find it quickly
Preview both desktop and mobile layouts before saving
Test on a live product page after publishing changes
Need more help?
If you need help getting the wishlist button to appear correctly, contact our team:
Email: [email protected]
Live chat: available from the app admin
Onboarding: book a free 1:1 onboarding call