Add the wishlist icon to collection pages (Online Store 2.0 themes)
Overview
Adding the wishlist icon to your collection pages lets customers save products while they browse, without opening each product page first. This usually increases wishlist use because customers can save items directly from collection grids, search results, and category pages.
This is one of the highest-impact wishlist setup steps for Shopify stores using Online Store 2.0 themes.
Online Store 2.0 themes (no code)
Use this method if your theme supports Shopify's theme editor sections or blocks. In most Online Store 2.0 themes, you can add the wishlist icon from the theme customizer without editing theme code.
Add the Wishlist icon to collection pages
In your Shopify admin, go to Online Store → Themes, then click Customize on your published theme.
At the top of the theme editor, open the page selector and switch to Collections → Default collection, or choose the specific collection template you want to update.
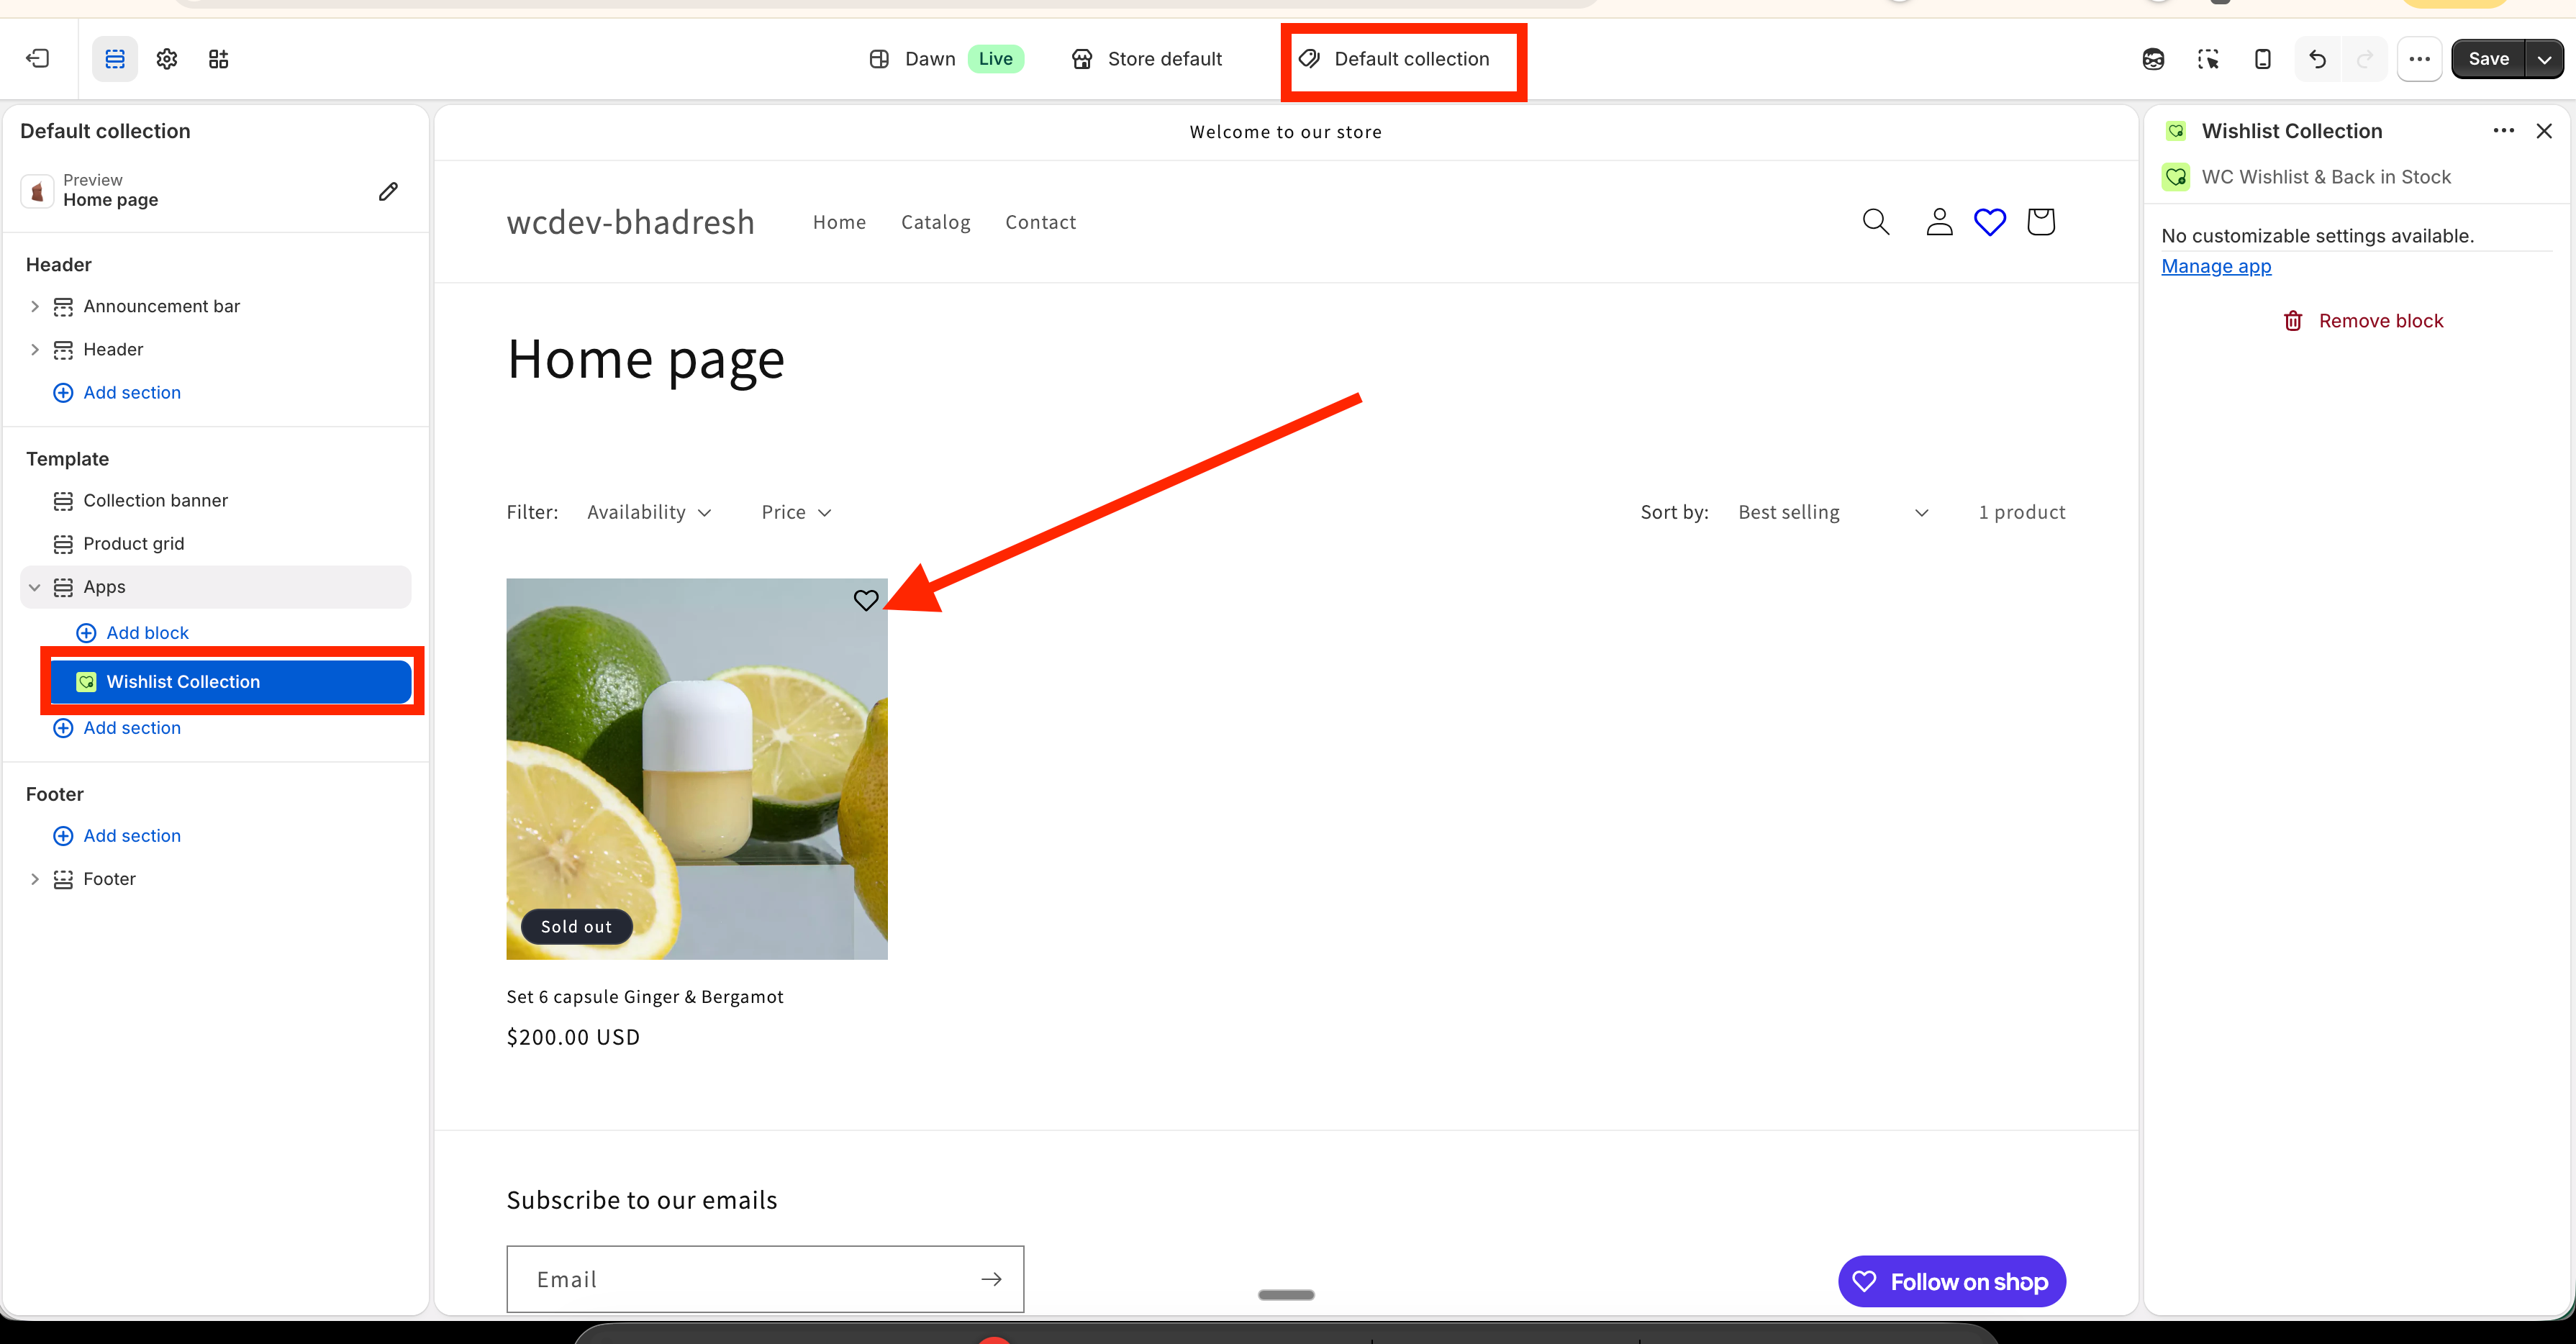
In the left sidebar, click Add section, search for Wishlist Collection, and select it.
In the live preview on the right, confirm that the wishlist icon appears on product cards in the collection grid.
Click Save in the top-right corner of the theme editor.
If your store uses multiple collection templates, repeat these steps for any template where you want the wishlist icon to appear.
If your theme supports nested blocks
Some Online Store 2.0 themes, including themes with nested block support such as Horizon, let you place the wishlist inside an existing product card block instead of adding it as a separate section.
This gives you more control over exactly where the wishlist icon appears on each product card.
In the theme editor, open the collection template that displays your product grid.
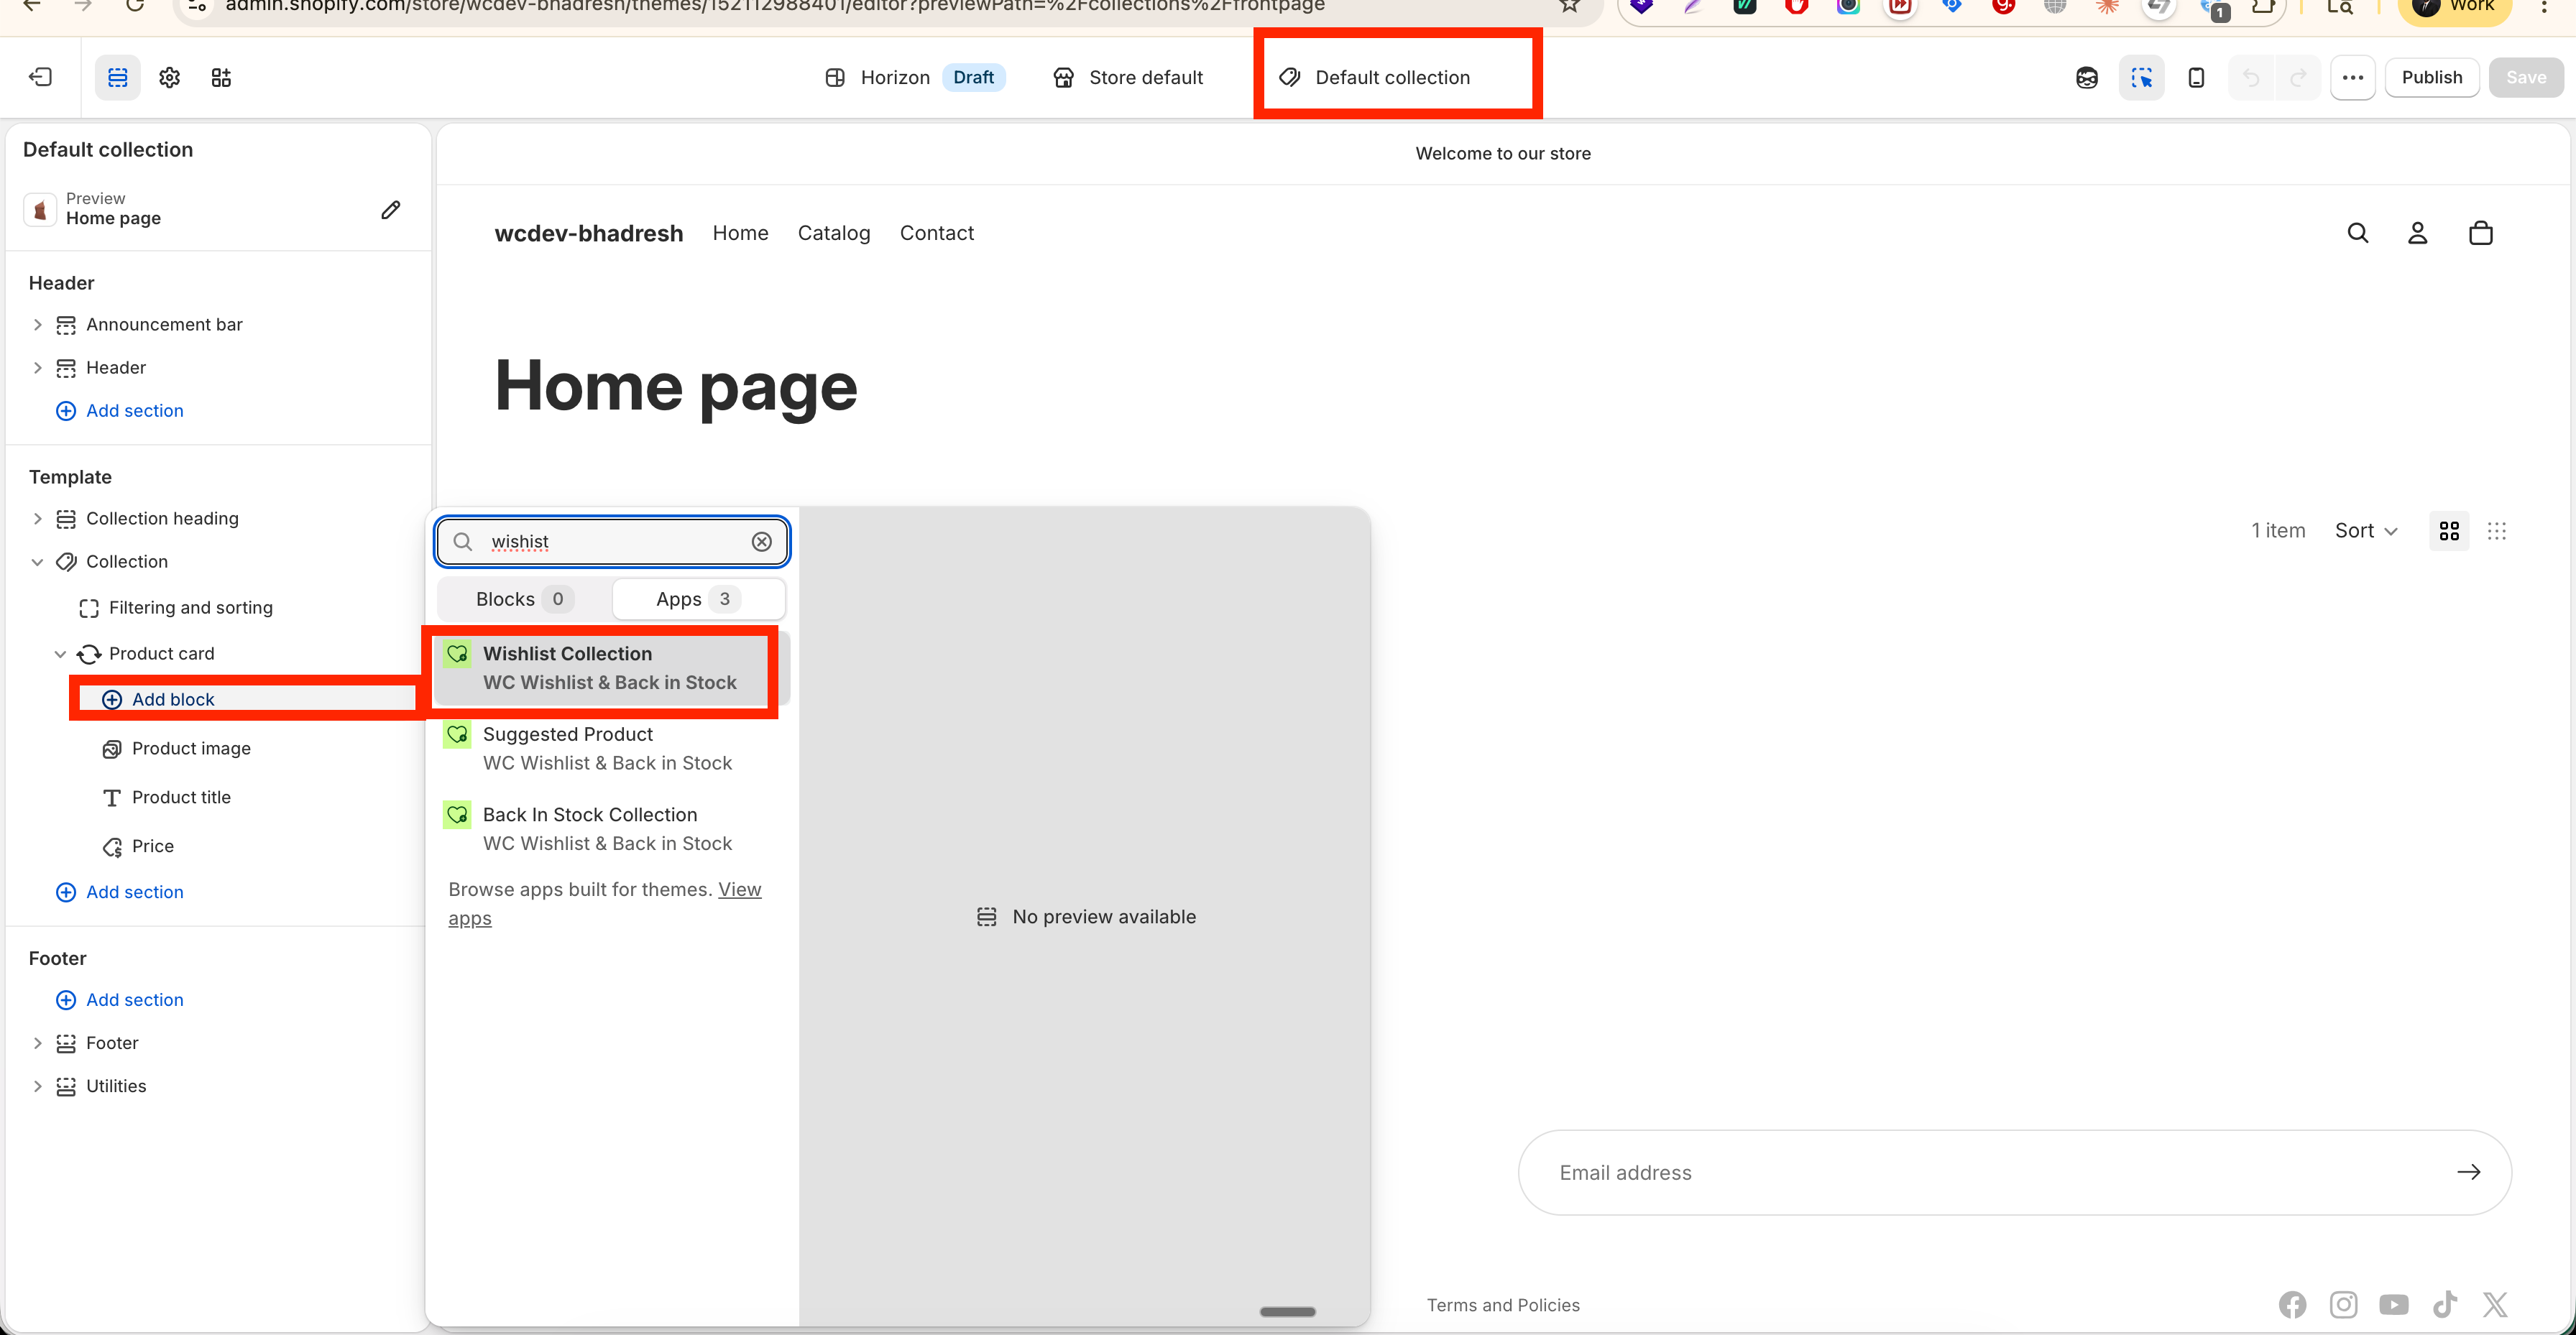
In the left sidebar, open the collection section and locate the product card or product grid block.
Click Add block inside the product card area, then choose the wishlist block if it is available in your theme.
Drag the block to the position you want, such as the top corner of the product card or near the product title.
Review the preview and click Save.
If your theme supports blocks inside product cards, this is usually the best option because it gives you more precise control over placement and layout.
Best practices
Place the icon where customers naturally look: the top-right area of the product card is often the easiest spot to notice without covering product details.
Test on desktop and mobile: make sure the icon is visible, easy to tap, and does not overlap badges, quick-add buttons, or sale labels.
Use collection templates consistently: if customers browse multiple collection layouts, add the wishlist icon to each one for a consistent experience.
Preview real products: test collection pages with products that have sale badges, multiple labels, or long titles to confirm the layout still looks clean.
How to confirm it's working
Open a collection page in your storefront preview.
Hover over or view a product card.
Make sure the wishlist icon is visible on each card.
Click the icon to confirm the product can be added to the wishlist directly from the collection page.
If you do not see the icon in the storefront after saving, make sure you edited the correct theme and the correct collection template. If your store uses alternate collection templates, the change may not appear everywhere until those templates are updated too.
Troubleshooting
Your current theme may not support this no-code placement option in that area, or you may be editing a section that does not allow it. First, confirm that you are using an Online Store 2.0 theme and that you are inside a collection template. If the option still does not appear, your theme may require a different placement method.
Your store may be using more than one collection template. Open each collection template used in your storefront and add the wishlist component where needed.
If your theme supports nested blocks, add the wishlist as a block inside the product card instead of as a separate section. This usually gives you better control over spacing and alignment.
Check that you customized your published theme rather than an unpublished draft. If you edited a draft theme, the change will only appear after that theme is published.
Need more help?
If you need help getting the wishlist button to appear correctly, contact our team:
Email: [email protected]
Live chat: available from the app admin
Onboarding: book a free 1:1 onboarding call