Add the wishlist button to your product pages (non-2.0 themes)
Overview
If your Shopify theme does not support Online Store 2.0 blocks, you can still show the wishlist button on your product pages by adding a small code snippet to your theme. This is a one-time setup and usually takes about 2 minutes.
If you already tried the block-based setup and did not see a Wishlist Product Block option in the theme editor, your theme is most likely a non-2.0 theme.
Before editing your theme code, duplicate your live theme so you have a backup to restore if needed.
Before you start
Make sure the app is installed and enabled in your store.
Use the instructions below only if your theme does not support Online Store 2.0 blocks.
You should be comfortable making a small edit in your Shopify theme code, or have someone on your team who can do it. Contact us and we will do all the setup.
How to open your theme code
In Shopify admin, go to:
Online Store → Themes → three dots (...) → Edit code
Add the wishlist button to your product page
In Shopify admin, go to Online Store → Themes.
Next to your live theme, click the three dots (...), then choose Duplicate. This gives you a safe backup before making changes.
Next to the theme you want to edit, click the three dots (...) and select Edit code.
In the file list on the left, look for the file that controls your product page. Common file names include:
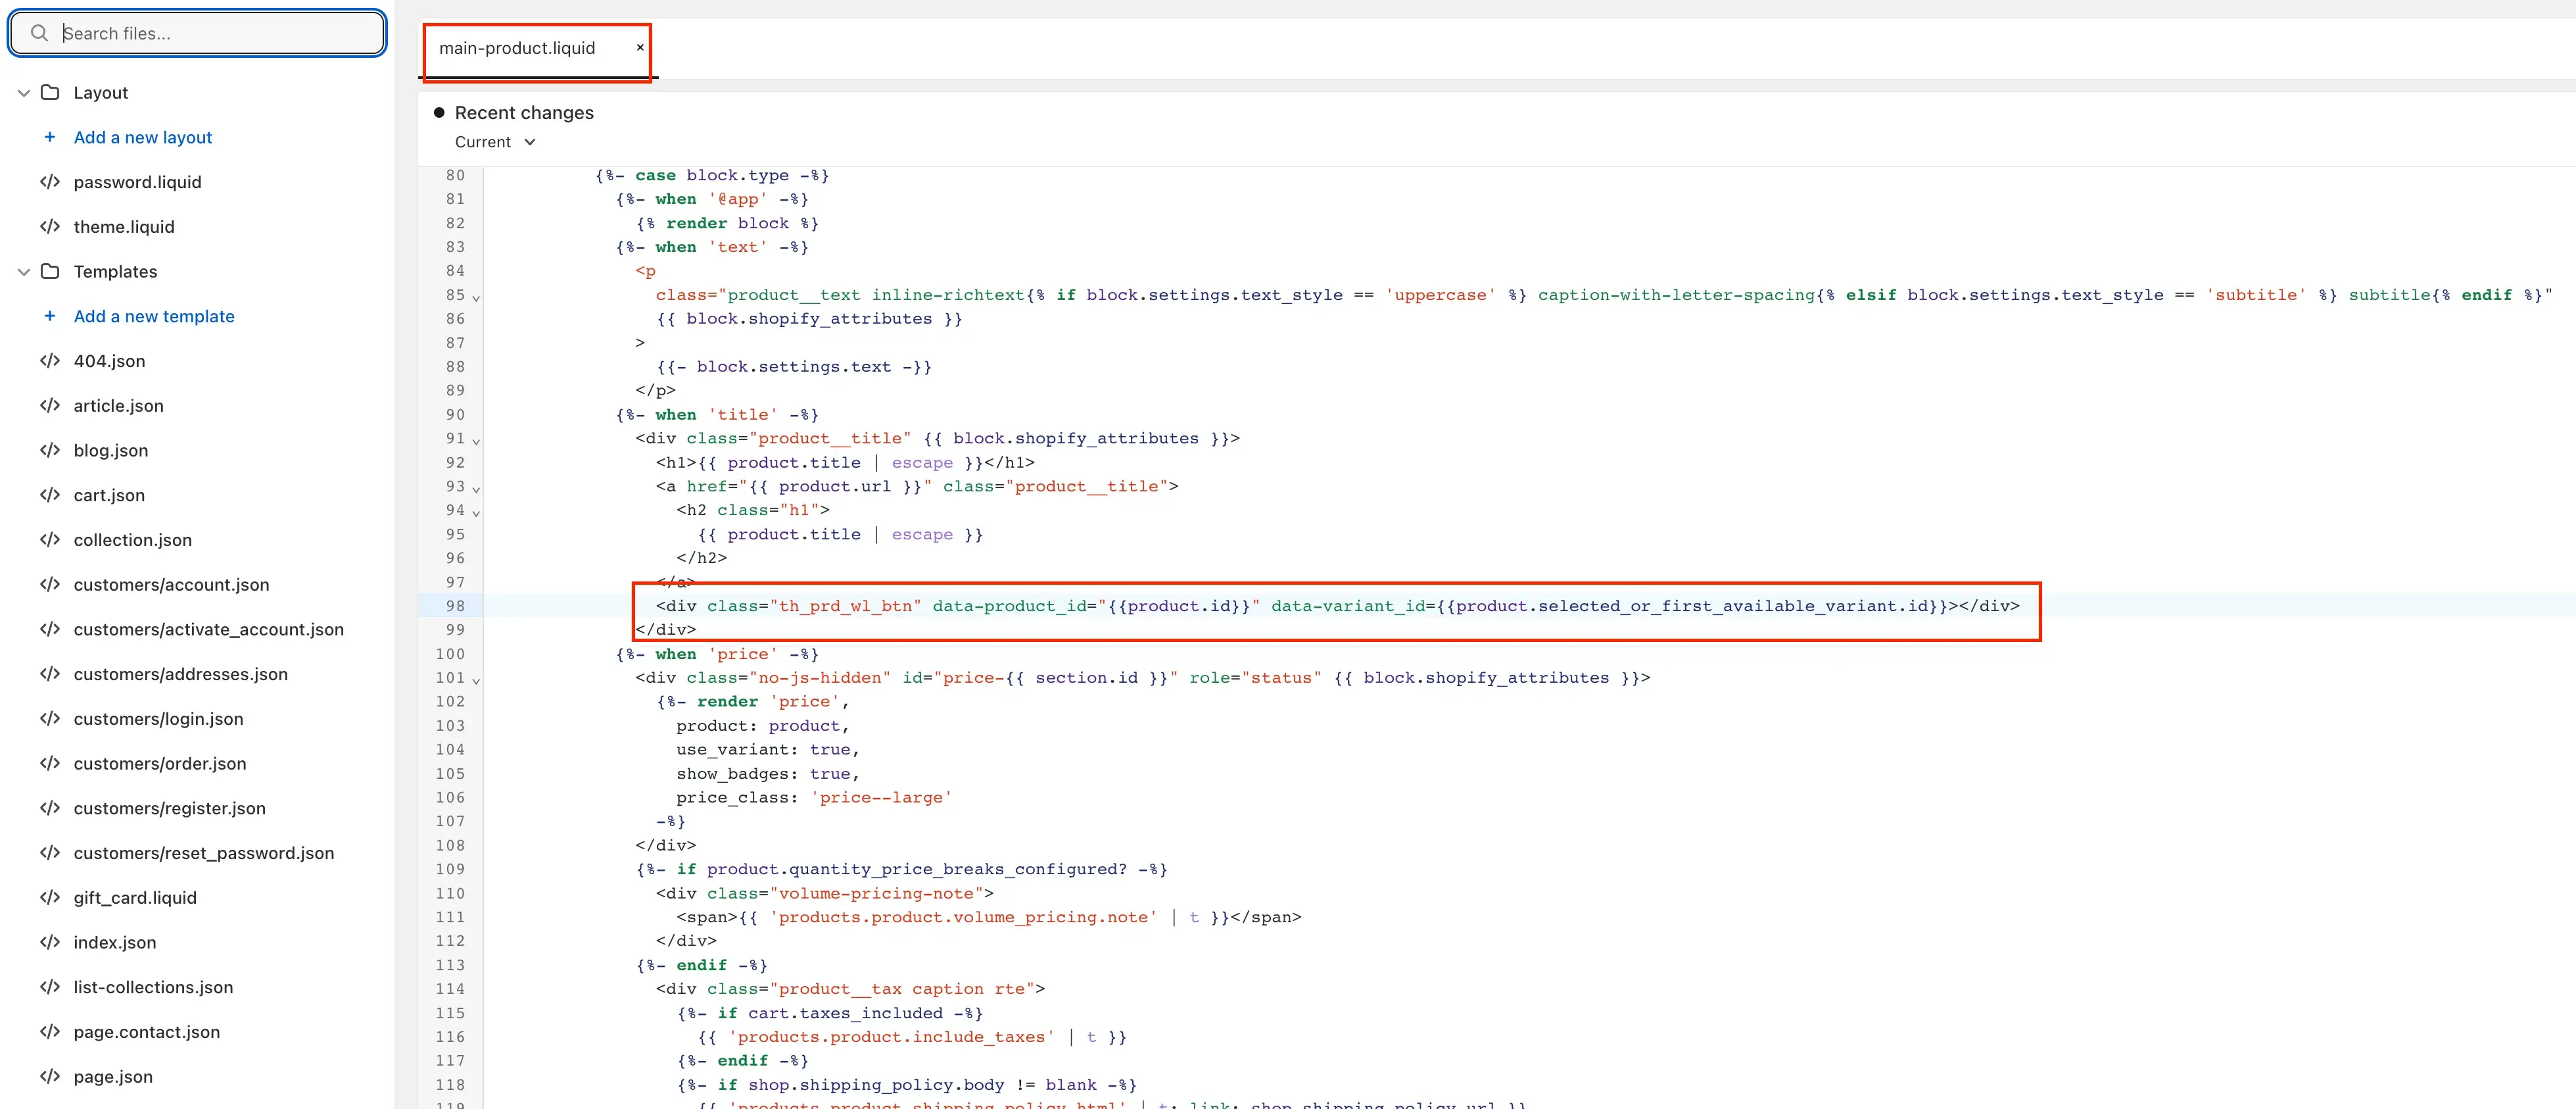
product-form.liquidmain-product.liquidproduct-template.liquid
Your theme may use a different file name. That is normal.
Open the file and look for the area near your:
Add to cart button, or
Product price
This is where most stores place the wishlist button.
Add this code where you want the wishlist button to appear:
<div class="th_prd_wl_btn"
  data-product_id="{{product.id}}"
  data-variant_id="{{product.selected_or_first_available_variant.id}}">
</div>
Click Save in the top-right corner of the code editor.
Open one of your product pages on the storefront and confirm the wishlist button appears in the position where you added the code.
Where exactly should I paste the code?
Paste the snippet in the spot where you want the wishlist button to appear on the product page.
Below the Add to cart button if you want it near the main purchase actions
Below the product price if you want it higher on the page
Once saved, the app automatically renders the wishlist button in that location.
There is no single correct placement. The best location is wherever it feels most natural for your shoppers on the product page.
Example
Important notes
Every Shopify theme is built differently, so the product page file name may not match the examples above.
If you place the code in the wrong file, the button may not appear on the storefront.
If your theme has multiple product templates, you may need to add the code to the template you are actively using.
After saving, refresh your storefront product page to check the result.
If you edit your live theme directly without a backup, it can be harder to undo mistakes. Always duplicate the theme first.
Troubleshooting
Your theme may use a different file structure. Search the code editor for keywords like add to cart, product, or the product form area, then add the snippet near that section.
Check these common causes:
The code was added to the wrong file
The code was placed outside the product form or product content area
The edited theme is not the one currently published
The page needs to be refreshed after saving
Move the snippet higher or lower in the product template file, then save again. The button will appear wherever the snippet is placed.
No problem. Our team can help install it for you.
Need help?
If you are not sure which file to edit, or you would rather have us handle the installation, contact our support team:
Email: [email protected]
Live chat: available from the app admin
Free onboarding 1:1 call
If you send us your theme name, we can usually tell you which product file to update much faster.