Show a wishlist icon in your store header
Overview
After you activate the app embed, many Shopify 2.0 themes will automatically show a wishlist icon in the header. If you already see a wishlist heart in your store header, you do not need to do anything else.
If it does not appear automatically, use one of the methods below:
Method 1: add a My Wishlist link to your store menu.
Method 2: add a wishlist heart icon with a counter to your header code.
The menu link method is the safest option for all themes. Use the code method only if you want the wishlist to appear as a heart icon in your header.
Before you start
Make sure the app is installed and the app embed is turned on.
Preview your theme after making changes so you can confirm the wishlist appears in the correct place.
If you are editing theme code, duplicate your live theme first so you have a backup.
Theme code files and header structure vary by theme. If your theme uses a different header file name or structure, place the code in the file that controls your header layout.
Method 1 — Add a wishlist menu item
This method adds a text link such as My Wishlist to your store navigation. It works well on all themes and does not require editing code.
In Shopify Admin, go to Content → Menus, then open your Main menu.
Click Add menu item.
In the Name field, enter My Wishlist, or use any label you prefer.
In the Link field, paste /apps/wishlist/.
Click Add, then click Save menu.
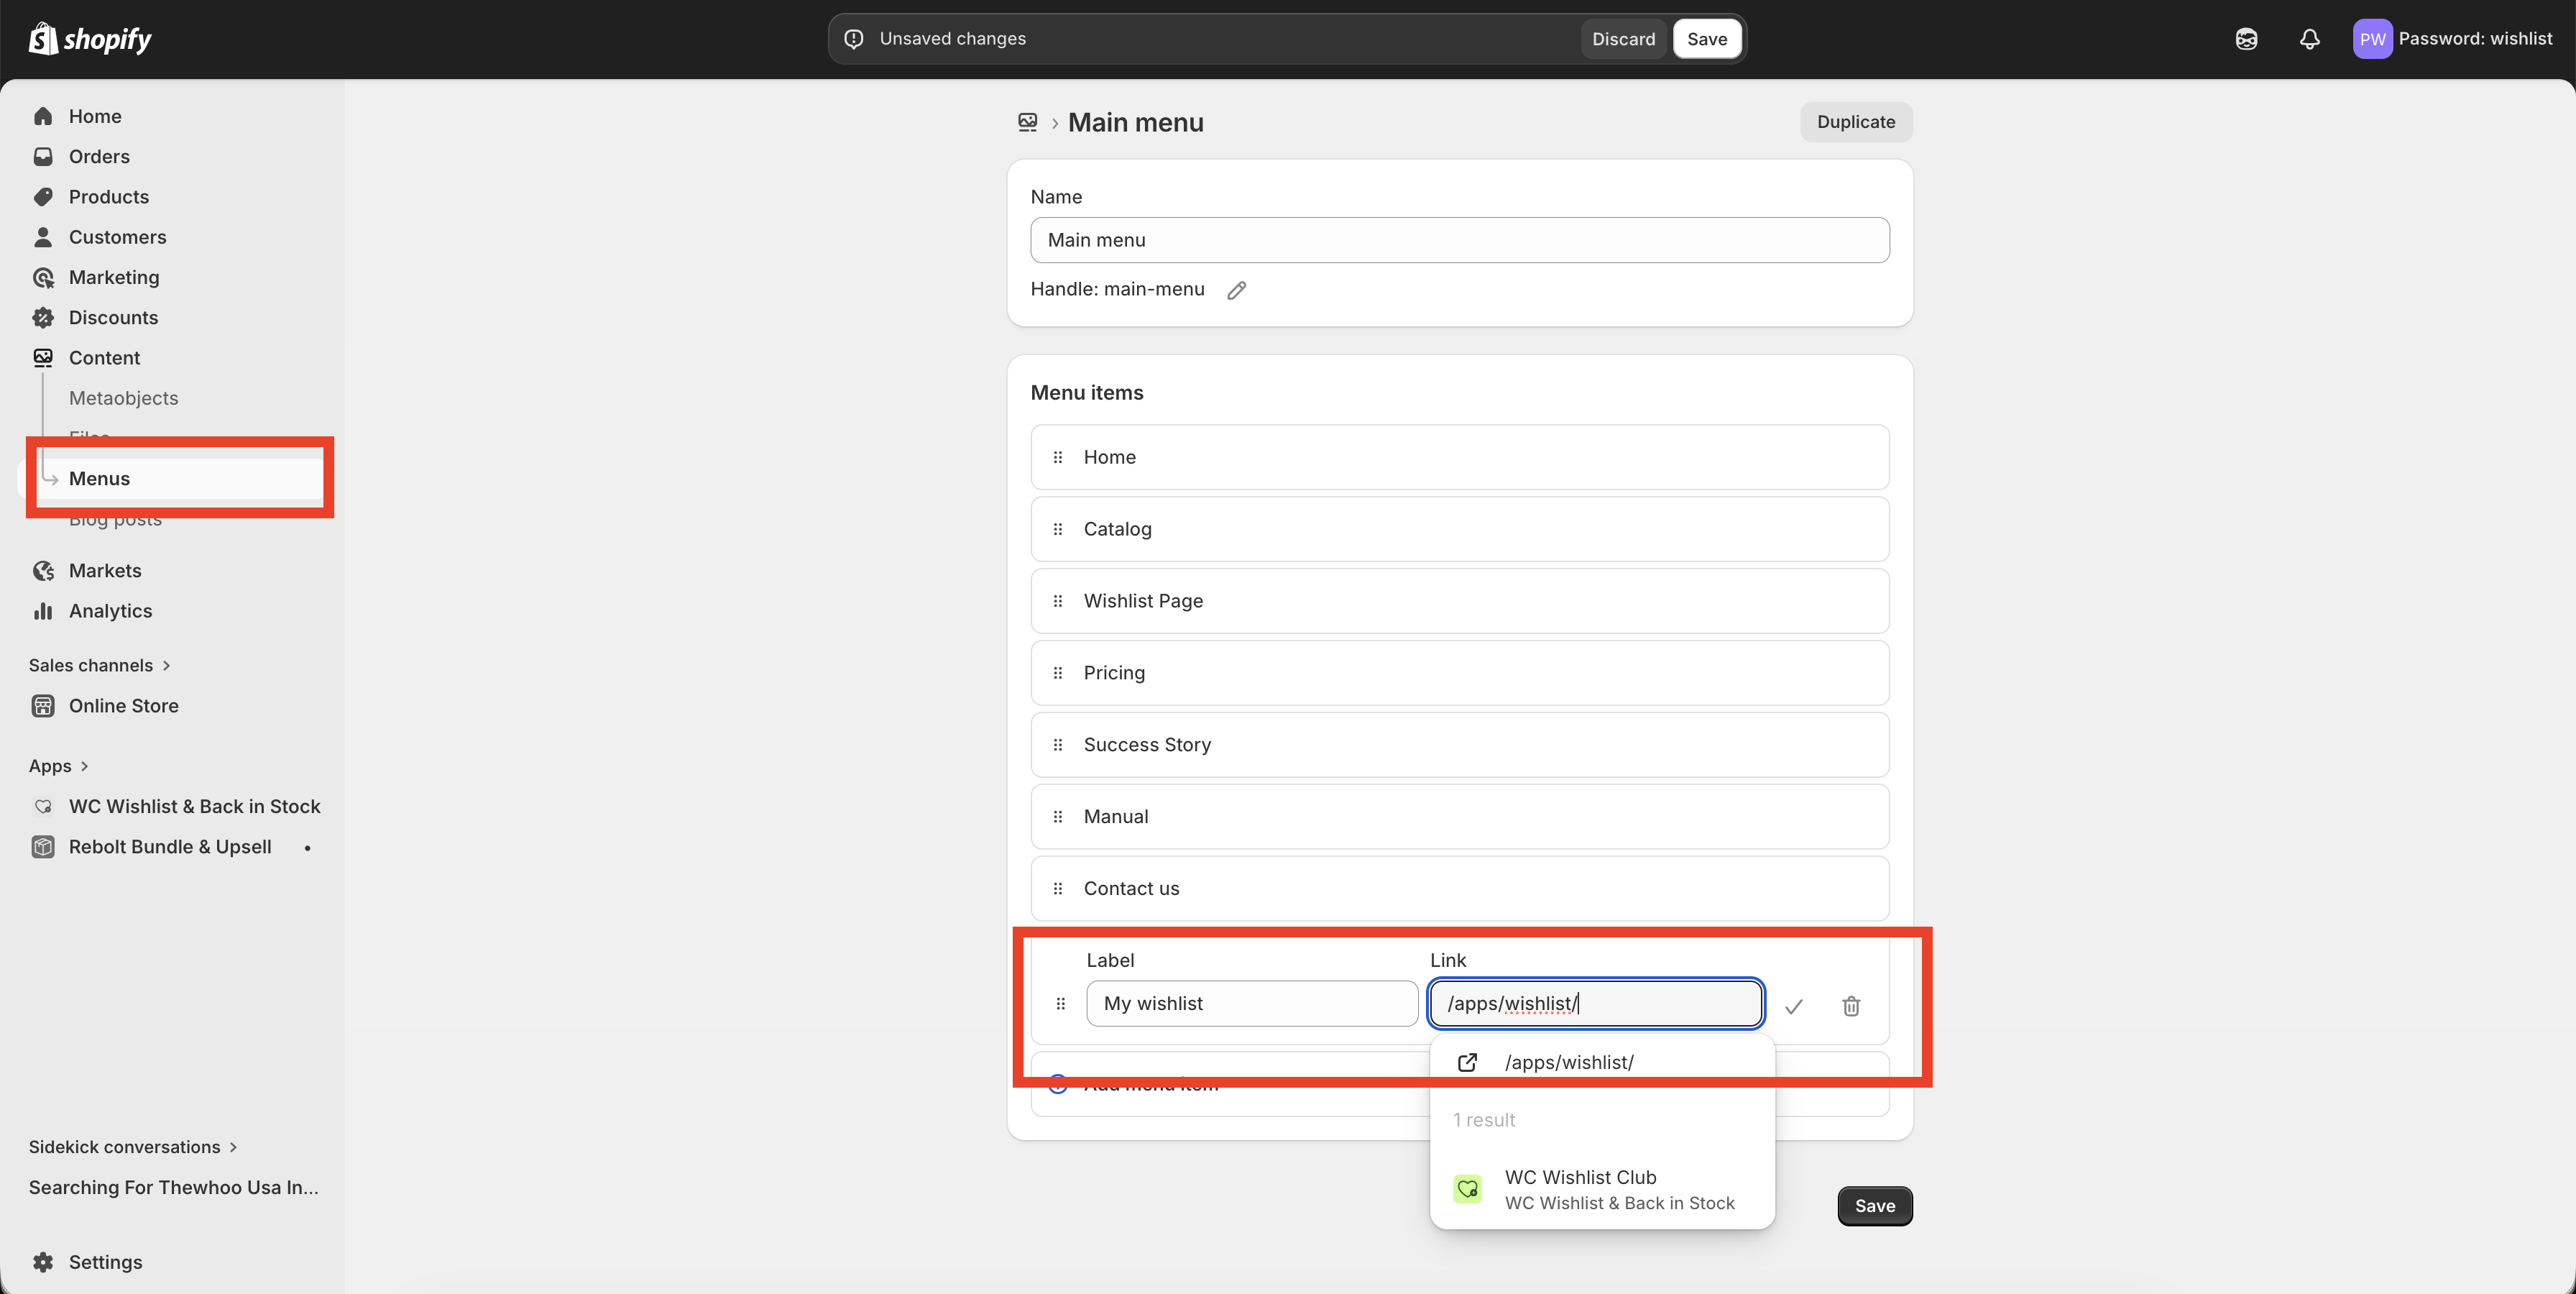
Your wishlist link will now appear in your store header navigation anywhere your main menu is shown.
If your theme displays menus differently on desktop and mobile, check both views after saving to make sure the new link appears where you expect.
Method 2 — Add the wishlist heart icon in the header
Use this method if you want a heart icon in your header instead of a text link. This version includes a wishlist count badge that can display how many items a customer has saved.
This method requires editing your theme code. Always duplicate your theme before making code changes.
In Shopify Admin, go to Online Store → Themes. On your current theme, click … then Edit code.
Open the file that controls your store header. Depending on your theme, this may be named header.liquid, header-section.liquid, or a similar file inside sections or snippets.
Find the part of the header where you want the wishlist icon to show, such as next to the search, account, or cart icons.
Add the code below in the spot where you want the icon to appear.
<a href="/apps/wishlist" class="th_wlc_position_relative" aria-label="My Wishlist">
  <div class="th_wlc_product_count"></div>
  <svg width="26" height="23" viewBox="0 0 26 23" fill="none" aria-hidden="true">
    <path d="M24.8759 3.27339C24.1475 2.06525 23.0806 1.12141 21.8207 0.57048C20.3932 -0.0562504 18.7897 -0.169062 17.1839 0.245058C15.7124 0.624602 14.279 1.4478 13 2.64198C11.7209 1.44769 10.2874 0.624442 8.8156 0.244952C7.20974 -0.169327 5.60622 -0.0564097 4.17865 0.570745C2.91872 1.12185 1.8519 2.06588 1.12359 3.27418C0.360858 4.53529 -0.0271625 6.06892 0.00147825 7.70909C0.128635 15.0007 10.5135 21.6311 12.594 22.8863C12.7175 22.9608 12.8575 23 13 23C13.1425 23 13.2825 22.9608 13.406 22.8863C15.4867 21.6309 25.8725 14.9993 25.9986 7.70782C26.0269 6.06775 25.6387 4.53428 24.8759 3.27339Z" fill="black"/>
  </svg>
</a>
Click Save, then preview your storefront to confirm the icon appears correctly in the header.

What this code does
Creates a clickable wishlist icon in the header.
Links customers to the wishlist page at
/apps/wishlist.Shows the wishlist item count using the app's counter element.
If your header already contains icons for search, account, or cart, place the wishlist code near those elements for the most consistent layout.
How to choose the best method
You want the fastest setup.
You do not want to edit theme code.
Your theme layout is heavily customized.
A text link in the navigation works for your design.
You want a heart icon in the header.
You want the wishlist count visible beside the icon.
You are comfortable editing theme files.
Your theme supports custom header elements cleanly.
Troubleshooting
Check the following:
The app embed is turned on.
You added the code to the correct header file.
The code was placed inside a visible header area, not inside a hidden or conditional block.
Your theme changes were saved successfully.
Remove the menu item if you no longer want a text link, then follow Method 2 to add the heart icon directly in your header.
Your theme may use custom spacing or icon wrappers. Move the code closer to your cart or account icon markup so it inherits the same styling and alignment.
Some themes use a separate mobile header layout. Check whether your theme has a different file or section for the mobile header and add the wishlist icon there if needed.
Best practices
Keep the wishlist easy to find by placing it near the cart or account icon.
Use a clear menu label such as My Wishlist if you choose the navigation link method.
Test both desktop and mobile header layouts after updating your theme.
If you edit code, make changes in a duplicate theme first and publish only after testing.
Need help?
If you are not sure which file to edit, or you would rather have us handle the installation, contact our support team:
Email: [email protected]
Live chat: available from the app admin
Free onboarding 1:1 call
If your theme automatically shows the wishlist icon after the app embed is enabled, no manual setup is required.