Facebook Meta integration — retarget customers using wishlist data
Overview
Wishlist activity is one of the strongest buying-intent signals you can send to Meta. When you connect Wishlist Club to your Meta Pixel, shopper actions such as adding an item to a wishlist, removing it, or returning after a price drop can be passed to Meta as events. You can then use those events to build audiences, improve retargeting, and make your Facebook and Instagram ads more relevant. Learn more.
This integration is designed to help you retarget shoppers based on wishlist behavior. It is especially useful for reminding interested customers about products they already saved. Learn How to connect FB & meta to Shopify store.
What this integration helps you do
After setup, Wishlist Club sends wishlist-related activity to your Meta Pixel so you can use it in Ads Manager and Events Manager.
Create audiences of shoppers who added specific products to their wishlist
Retarget shoppers when a wishlisted product drops in price
Bring back shoppers when a wishlisted item is restocked
Build higher-intent retargeting audiences from customers who showed strong product interest
Support product-focused campaigns on Facebook and Instagram using wishlist behavior
For the best results, use wishlist events alongside your standard Meta events such as ViewContent, AddToCart, and Purchase. This gives Meta more context across the full customer journey.
Wishlist events sent to Meta
The integration can send the following wishlist actions to your Meta Pixel.
Wishlist event | How you can use it in ads |
|---|---|
Item Added to Wishlist | Retarget shoppers with ads for the exact product they saved. |
Item Removed from Wishlist | Track changing interest and exclude less-relevant shoppers from some campaigns. |
Price Drop on Wishlist Item | Retarget at the moment price sensitivity is highest. |
Wishlist Item Back in Stock | Drive urgency when saved products become available again. |
Wishlist Item Low in Stock | Run scarcity-based reminder campaigns. |
Wishlist Reminder | Re-engage shoppers who saved an item but have not returned. |
Abandoned Wishlist | Build a high-intent retargeting audience from shoppers who showed strong interest but did not purchase. |
Before you start
You need access to your Meta Business account.
You need the correct Meta Pixel already created in Events Manager.
You need permission to view pixel settings and generate or copy the access token used by Meta.
Your store should already be using Wishlist Club on the storefront so wishlist activity can be captured.
Use the Pixel ID and access token for the same Meta Pixel. If they do not match, events may fail to send or appear under the wrong data source.
Set up the Meta integration
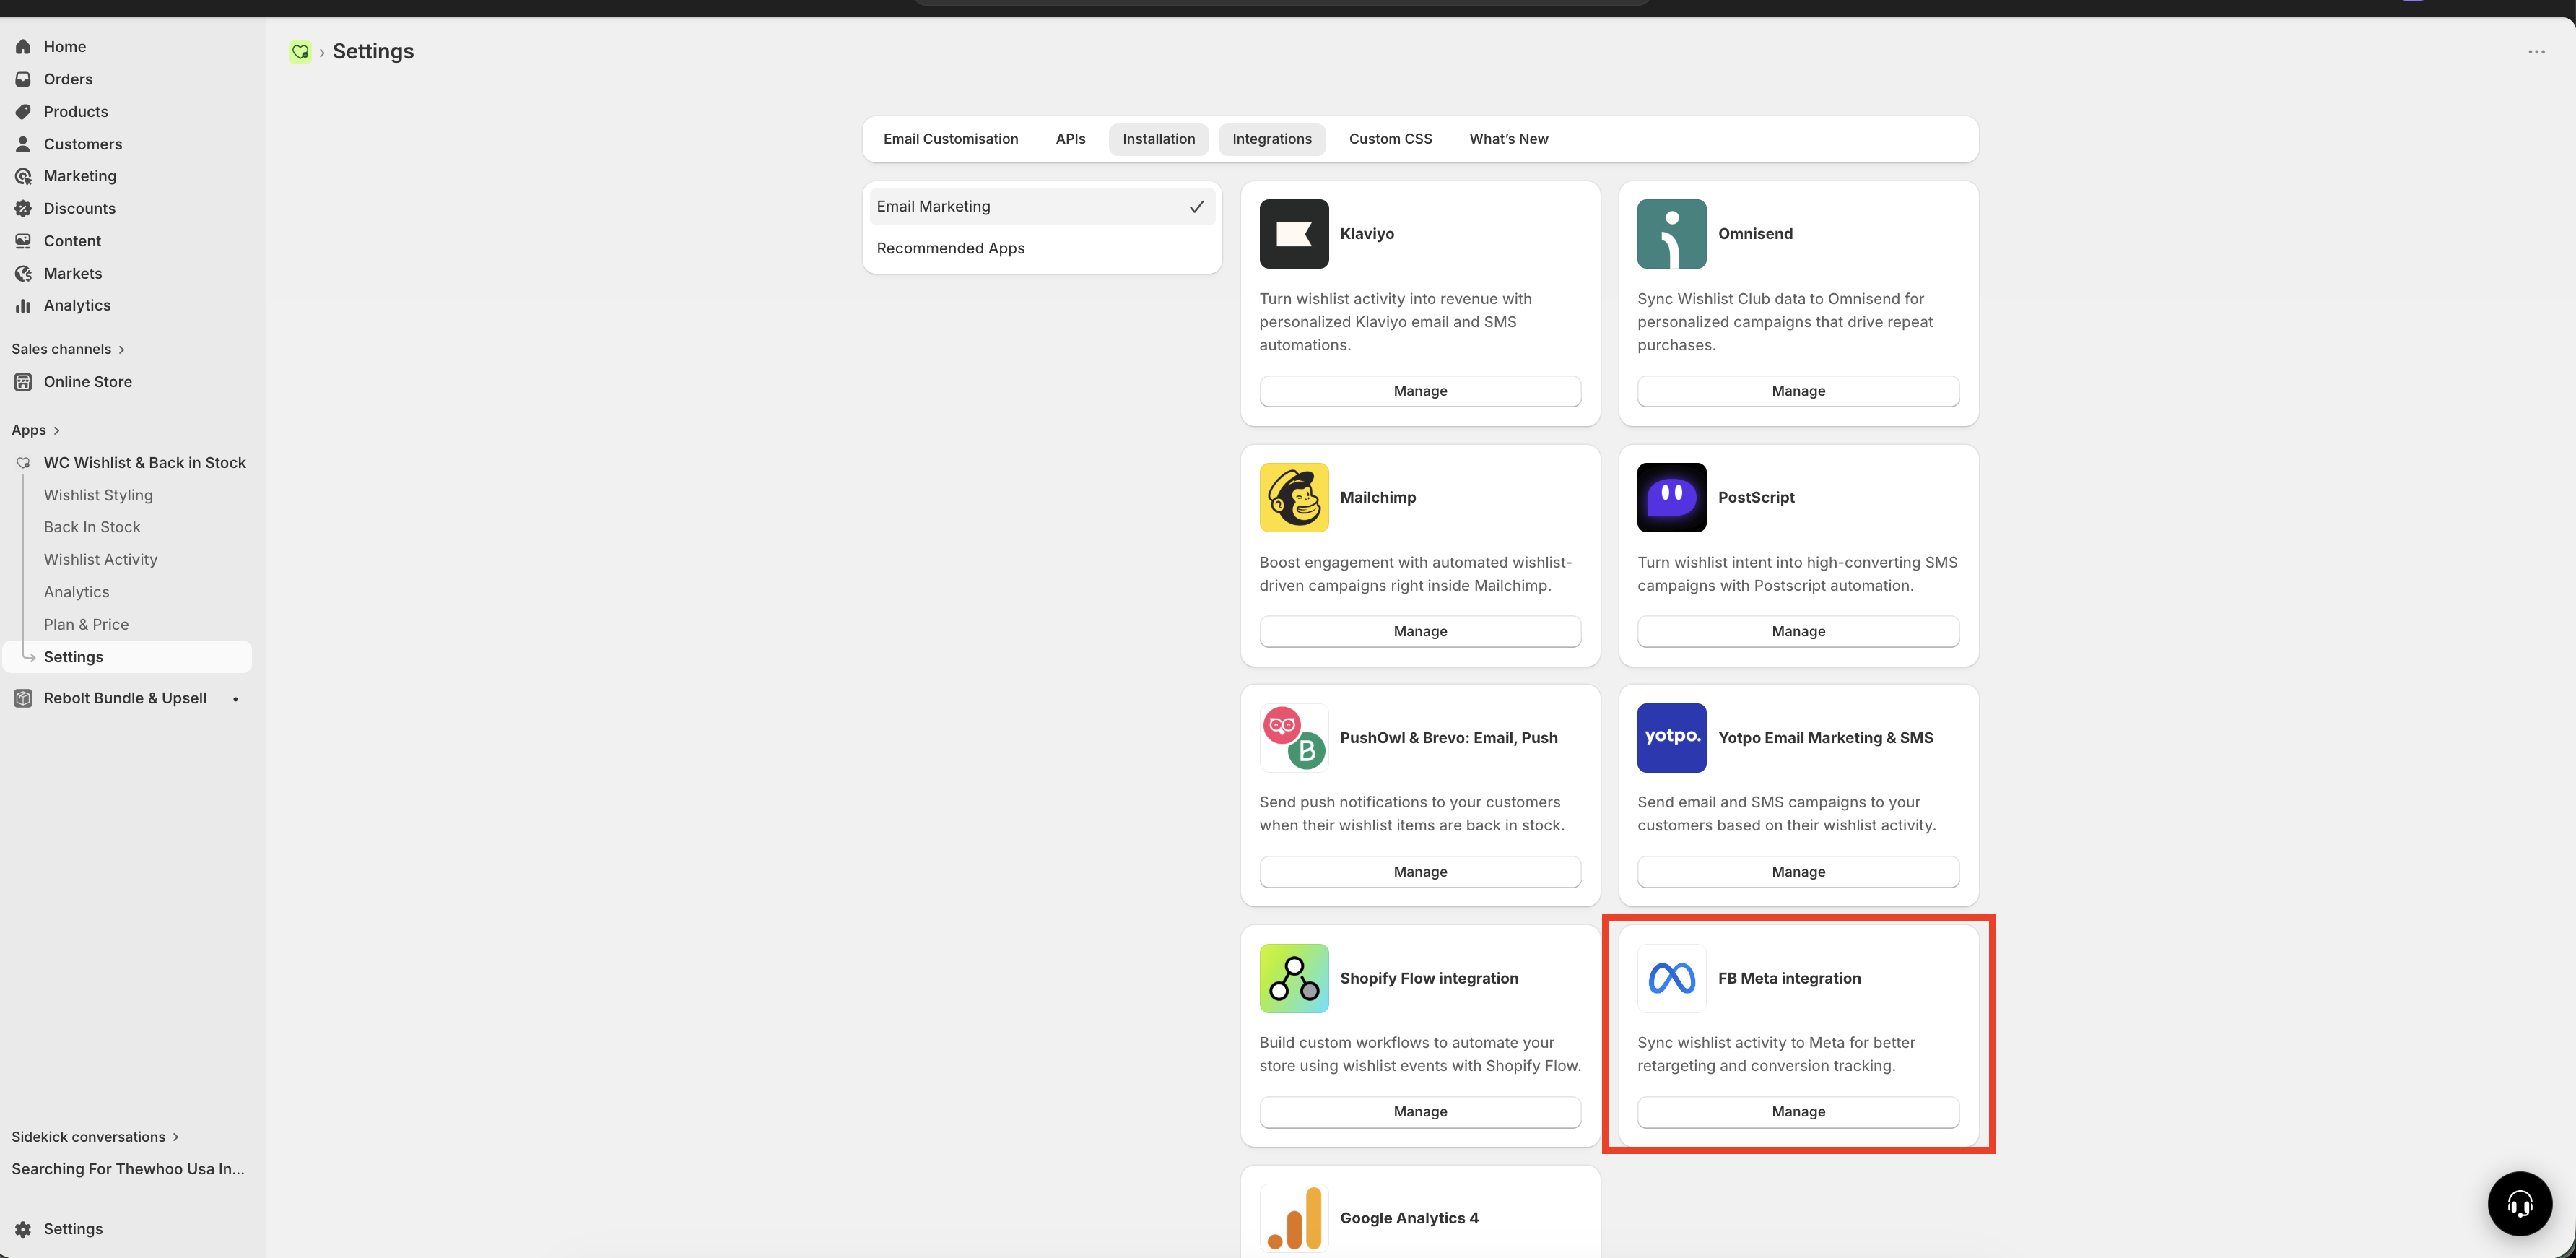
In Shopify, go to Apps → WC Wishlist & Back in Stock → Settings → Integrations → FB Meta Integration.
Turn on the connection toggle to start setup.
In Meta Business Manager, open Events Manager and select the pixel you want to use.
Open the pixel settings and copy the Pixel ID.
Paste that value into the Pixel ID field in Wishlist Club.
Where to find Pixel ID? Refer to this article to create a Pixel ID
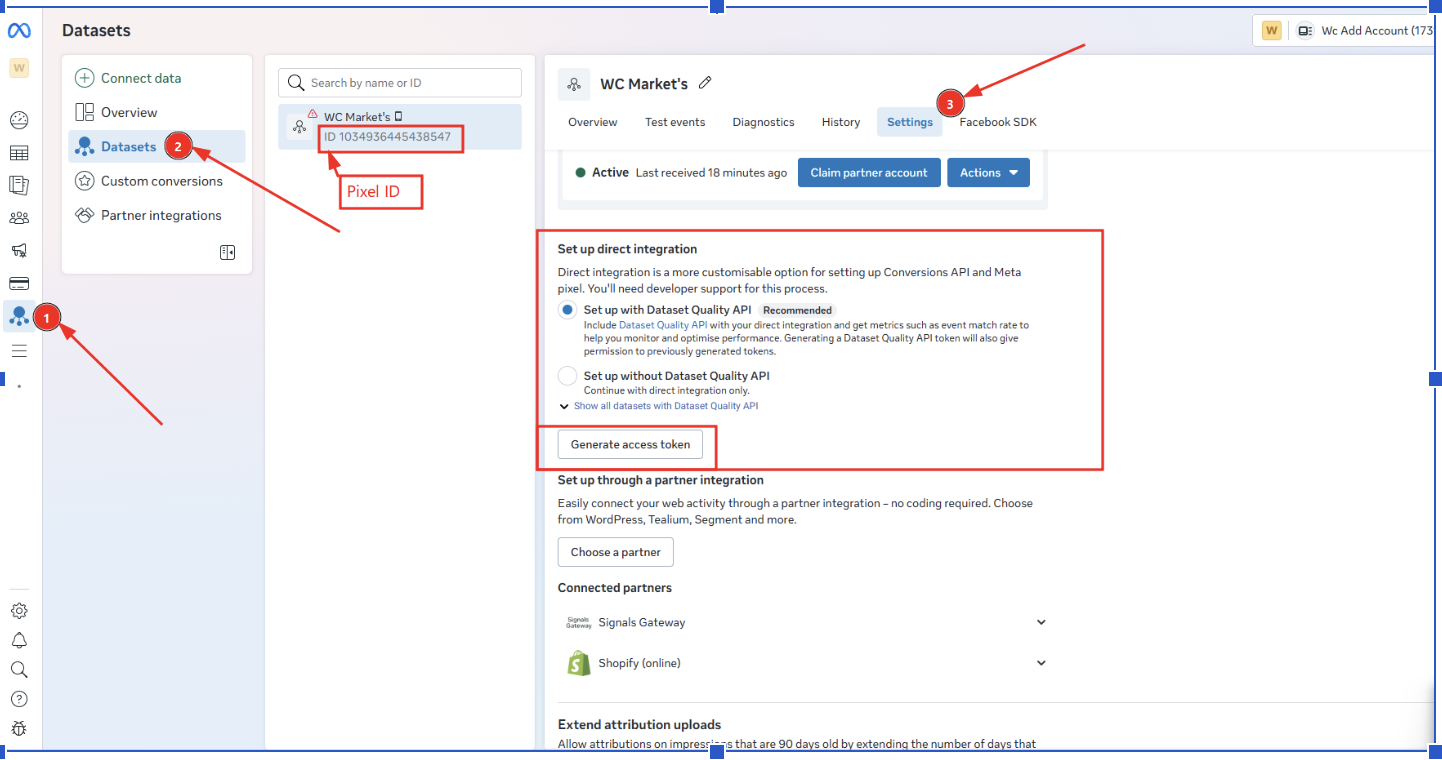
In your Meta account, locate the access token for the same pixel or conversion data source you are using.
Copy the token and paste it into the Access Token field in Wishlist Club.
Save your changes.
Where to find the Access Token? Refer to this article to create an Access token
After entering the Pixel ID and access token, enable event syncing for wishlist activity.
If your settings page shows individual event options, keep the key shopper-intent events enabled, especially wishlist adds, price drops, and back-in-stock actions.
Open your storefront and perform a real wishlist action, such as adding a product to a wishlist.
Then check Meta Events Manager to confirm the event was received.
Recommended setup for best results
If your goal is to make this integration work as well as possible, start with the events that usually create the strongest retargeting opportunities.
Enable Item Added to Wishlist: this is your strongest general audience for product-interest retargeting.
Enable Price Drop on Wishlist Item: this is ideal for conversion-focused reminder campaigns.
Enable Wishlist Item Back in Stock: this works well for urgency and recovery campaigns.
Use dynamic product ads when available in your Meta setup: this helps show the exact items shoppers saved.
Exclude recent purchasers: avoid wasting spend on customers who already bought the product.
Allow time for audience building: new custom audiences need enough event volume before campaigns perform consistently.
A simple high-performing audience to start with is: shoppers who added an item to a wishlist in the last 30 days, but did not purchase in the last 14 days.
How to use wishlist data in Meta
Create a custom audience
Open Meta Ads Manager.
Go to Audiences.
Create a Custom Audience based on website or pixel activity.
Select the wishlist event you want to use, such as Item Added to Wishlist.
Set a retention window, such as 7, 14, or 30 days.
Save the audience and use it in your campaigns.
Create a lookalike audience
Start with a custom audience built from strong wishlist activity.
Create a Lookalike Audience from that source audience.
Choose the market and audience size that fits your campaign goals.
Run retargeting campaigns
Common campaign ideas include:
Show reminder ads for products customers added to a wishlist
Promote recently discounted wishlisted products
Announce when saved items are back in stock
Use low-stock messaging to create urgency for saved items
How to confirm events are working
Open Meta Events Manager.
Select the pixel connected in Wishlist Club.
Use the testing or live activity view available in your Meta account.
Perform a wishlist action on your storefront.
Confirm the event appears in Meta.
Some events may not appear instantly in every Meta reporting view. If you have just completed setup, allow a short processing delay before assuming the connection failed.
Best practices
Use clear audience windows such as 7, 14, or 30 days depending on your sales cycle.
Segment by event type instead of putting all wishlist shoppers into one audience.
Refresh your creative regularly for reminder and urgency campaigns.
Exclude people who recently purchased the same product.
Focus first on events with the strongest buying intent before expanding to broader retargeting.
Troubleshooting
Make sure the integration is enabled in Wishlist Club.
Confirm the Pixel ID is correct.
Confirm the access token belongs to the same Meta data source.
Perform a fresh wishlist action after saving the settings.
Check whether your storefront theme or consent settings are preventing tracking.
Check the Pixel ID entered in Wishlist Club and compare it with the pixel selected in Meta Events Manager. Update the settings so both match, then test again.
This usually means there is not enough wishlist event volume yet. Expand the audience window, include more products, or wait until more shoppers interact with wishlists.
Try separating audiences by event type. For example, keep price-drop audiences separate from general wishlist-add audiences. Also exclude recent purchasers and review your ad creative for product relevance.
Privacy and consent
You are responsible for using Meta tracking in line with your store’s privacy policy, consent settings, and local legal requirements. If your store uses a consent banner, make sure your tracking setup follows the choices your visitors make.
If your store requires visitor consent before marketing tracking can run, wishlist events may not be sent until consent is granted.
Need help?
If you are not sure which file to edit, or you would rather have us handle the installation, contact our support team:
Email: [email protected]
Live chat: available from the app admin
Free onboarding 1:1 call