Add custom CSS for advanced wishlist styling
Overview
The standard styling settings in Wishlist Club cover the most common design changes. If you want more control over how your wishlist and Back in Stock features look, you can add your own CSS.
Use the Custom CSS editor to fine-tune colors, spacing, typography, hover states, button styles, popup styling, and mobile layout details so these features match your storefront more closely.
Custom CSS applies only to the wishlist and Back in Stock elements added by the app. It does not change the rest of your theme unless your CSS targets theme elements directly.
What you can customize
Wishlist buttons
Background color
Text color
Border radius
Font size and font weight
Border, shadow, and spacing
Hover and transition effects
Back in Stock popup
Popup background and border
Input field styling
Button appearance
Success and error message styling
Overlay color and opacity
Wishlist page
Product card spacing and layout
Grid columns and gaps
Product title and price typography
Button size and placement
Mobile-specific layout adjustments
How to use the Custom CSS editor
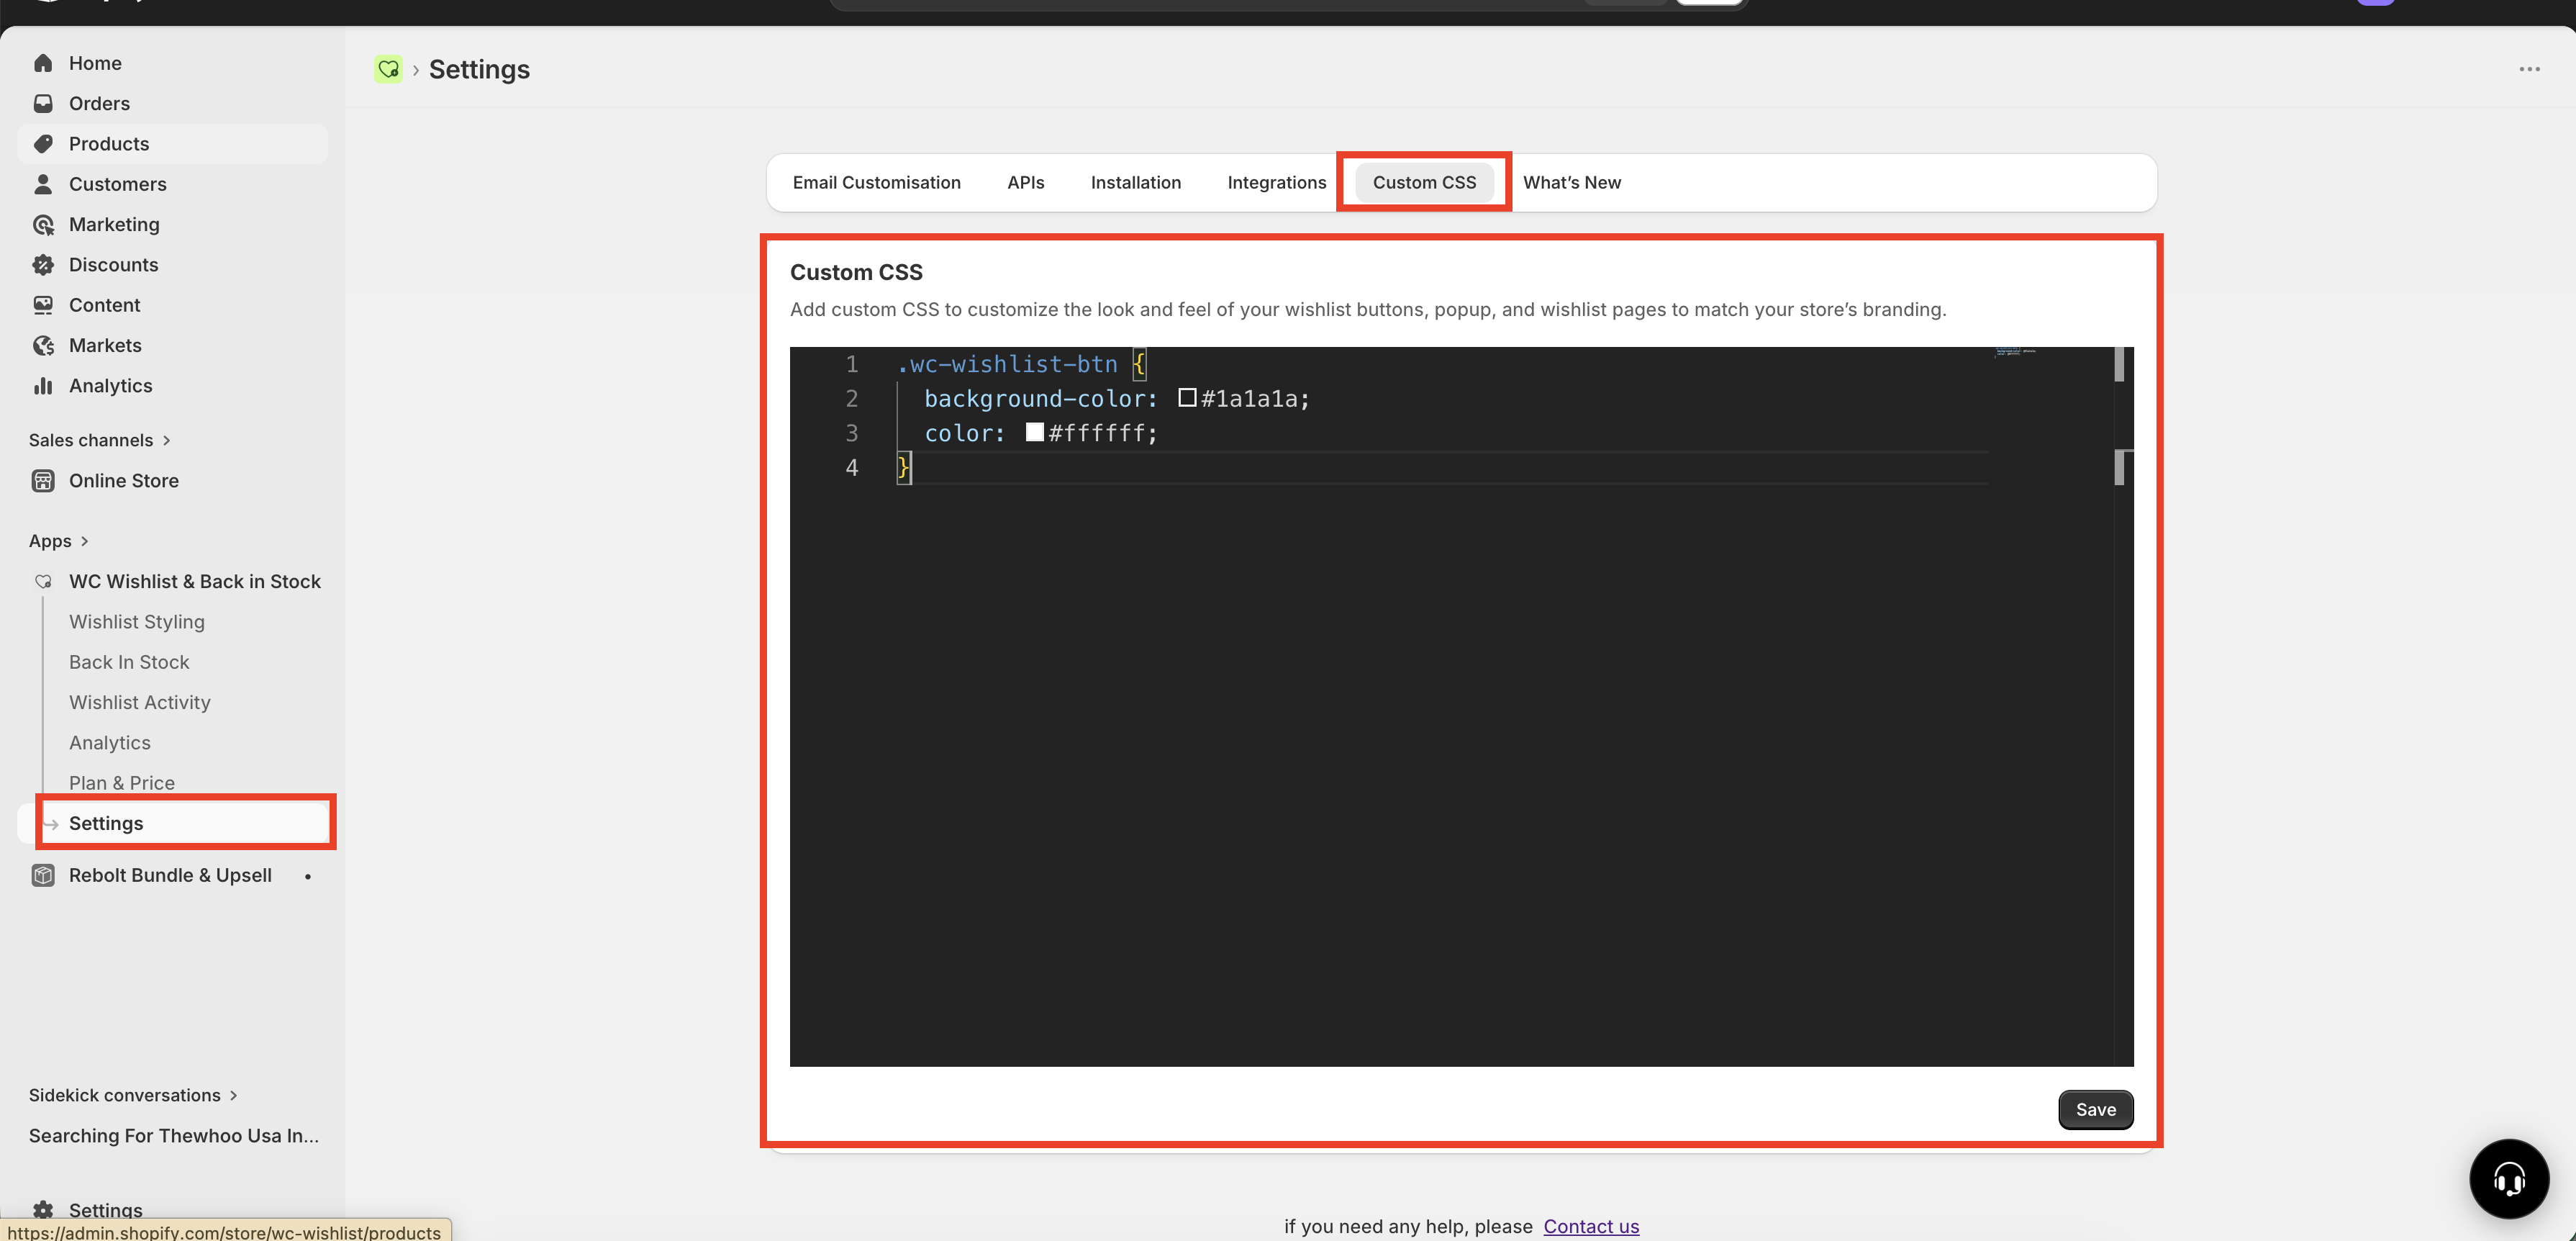
In Shopify admin, go to Apps → WC Wishlist & Back in Stock → Settings → Custom CSS.
Type or paste your CSS into the editor. You can add a single rule or build a larger set of style changes over time.
Click Save after updating the code.
Reload the storefront page where the wishlist or Back in Stock feature appears to confirm the changes were applied.
Review the design on both desktop and mobile so your changes look correct across screen sizes.
Best practices
Make small changes and test each one before adding more. This makes it much easier to spot which rule caused a layout or styling issue.
Start with one element at a time. For example, update the wishlist button first before styling the popup or wishlist page.
Test on product pages, collection pages, and the wishlist page. The same element may appear differently depending on where it loads.
Always check mobile. Spacing, font sizes, and button widths often need separate adjustments for smaller screens.
Use the app’s selectors only. Target wishlist and Back in Stock classes so you do not accidentally affect unrelated theme elements.
Keep a backup of working CSS. Before making major edits, copy your current CSS into a note so you can restore it quickly if needed.
Avoid overly broad rules. Generic selectors like
button,input, ordivcan change parts of your theme outside the app.
If a style change does not appear right away, clear your browser cache or test in a private browsing window. Theme and browser caching can delay visible updates.
Example CSS snippets
Use these examples as a starting point. You can adjust colors, spacing, and sizes to match your brand.
Change the wishlist button background color
.wc-wishlist-btn {
  background-color: #1a1a1a;
  color: #ffffff;
}
Add rounded corners to the wishlist button
.wc-wishlist-btn {
  border-radius: 8px;
}
Style the Back in Stock popup container
.wc-notify-popup {
  border-radius: 12px;
  padding: 20px;
  box-shadow: 0 4px 24px rgba(0, 0, 0, 0.12);
}
Add a hover effect to the wishlist button
.wc-wishlist-btn {
  transition: opacity 0.2s ease;
}

.wc-wishlist-btn:hover {
  opacity: 0.85;
}
Style the email input field in the popup
.wc-notify-popup input[type="email"] {
  border: 1px solid #d1d5db;
  border-radius: 8px;
  padding: 12px;
  font-size: 14px;
}
Update the submit button in the popup
.wc-notify-popup button {
  background-color: #111827;
  color: #ffffff;
  border-radius: 8px;
  padding: 12px 16px;
  font-weight: 600;
}
Adjust wishlist page card spacing
.wc-wishlist-page .wc-product-card {
  padding: 16px;
  border-radius: 12px;
  box-shadow: 0 2px 12px rgba(0, 0, 0, 0.08);
}
Improve mobile spacing
@media (max-width: 767px) {
  .wc-wishlist-btn {
    width: 100%;
    font-size: 14px;
  }

  .wc-wishlist-page .wc-product-card {
    padding: 12px;
  }
}
Common use cases
Update background color, text color, border radius, and font styling so the wishlist button looks consistent with your storefront buttons.
Adjust popup spacing, border radius, field styling, and submit button colors so the popup matches the rest of your store experience.
Use media queries to increase button width, reduce card padding, and tighten typography spacing for smaller screens.
Customize product cards, grid spacing, title styles, and action buttons to create a cleaner saved-items experience.
Troubleshooting
My CSS changes are not showing
Make sure you clicked Save in the Custom CSS editor.
Refresh the storefront page after saving.
Clear your browser cache or test in an incognito window.
Confirm that your selector matches the app element you want to style.
My layout looks good on desktop but breaks on mobile
Review spacing, widths, and font sizes on smaller screens.
Add mobile-specific rules with a media query.
Avoid fixed widths unless you have tested them across devices.
A theme element changed unexpectedly
Check whether you used a broad selector such as
buttonorinput.Replace it with a more specific selector that targets only app elements.
Before you save large changes
If you are making several visual changes at once, copy your current CSS into a safe place before editing. That gives you a quick rollback option if the new styling does not behave as expected.
Need more help?
If you need help getting the wishlist button to appear correctly, contact our team:
Email: [email protected]
Live chat: available from the app admin
Onboarding: book a free 1:1 onboarding call